.png?width=500&height=131&name=horiz-onwhite-noslogan%20(1).png)
Overview
EVA devices are managed through the Liger Mobile Device Management (MDM) system.
EVA Plus devices that are still configured under the legacy MaaS360 management app must be transitioned to Liger MDM.
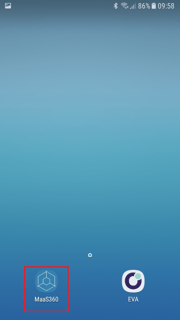
If your EVA Plus home screen appears as shown below, please proceed with the steps outlined next.
Enroll EVA Plus device to Liger MDM steps
- 1. Exams backup
- 2. Disconnect the device from MaaS360
- 3. Factory Reset and Reinstalling the Device
- 4. MDM Enrollment
1. Exams backup
Caution: All data on the device will be lost including exams data, images, videos and user data. To avoid data loss, ensure that all your users exams has been synced or exported before updating.
Before proceeding, ensure all of the following requirements are met:
- The device is connected to Wi-Fi, and the Wi-Fi password is available.
For instructions on connecting the device to Wi-Fi, see HERE. - All users on the device have confirmed that their exams are fully backed up:
- All draft exams have been completed.
-
- Exams completed by opt-in users have been synced.
- Exams completed by opt-out users have been exported.
-
- All ZIP exports have been removed from the device.
For more information and related instructions, refer to the following articles:
2. Disconnect the device from MaaS360
- Open MaaS360.
- Tap on Settings.
- Tap the three-dot menu in the top-right corner.
- Select “Remove MDM Control”
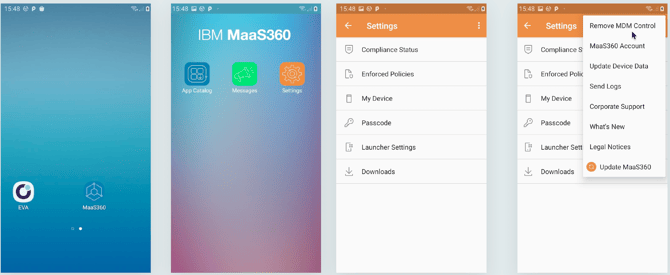
- Insert passcode: abc123

3. Factory Reset and Reinstalling the Device
See a quick steps video:
Factory Reset
Note: On some devices, after completing 'Step 2: Disconnect the device from MaaS360' above, the device may automatically reboot and reset, making a manual factory reset unnecessary. If your device reboots automatically, proceed directly to 'Step 2' below.
Step 1 - Manual factory reset
- Open phone Settings
- Tap on General management
- Tap on Reset
- Tap on Factory data reset
- Tap on RESET
- Tap on ‘DELETE ALL’
 .
. 


Step 2
The device will reboot and erasing

Step 3
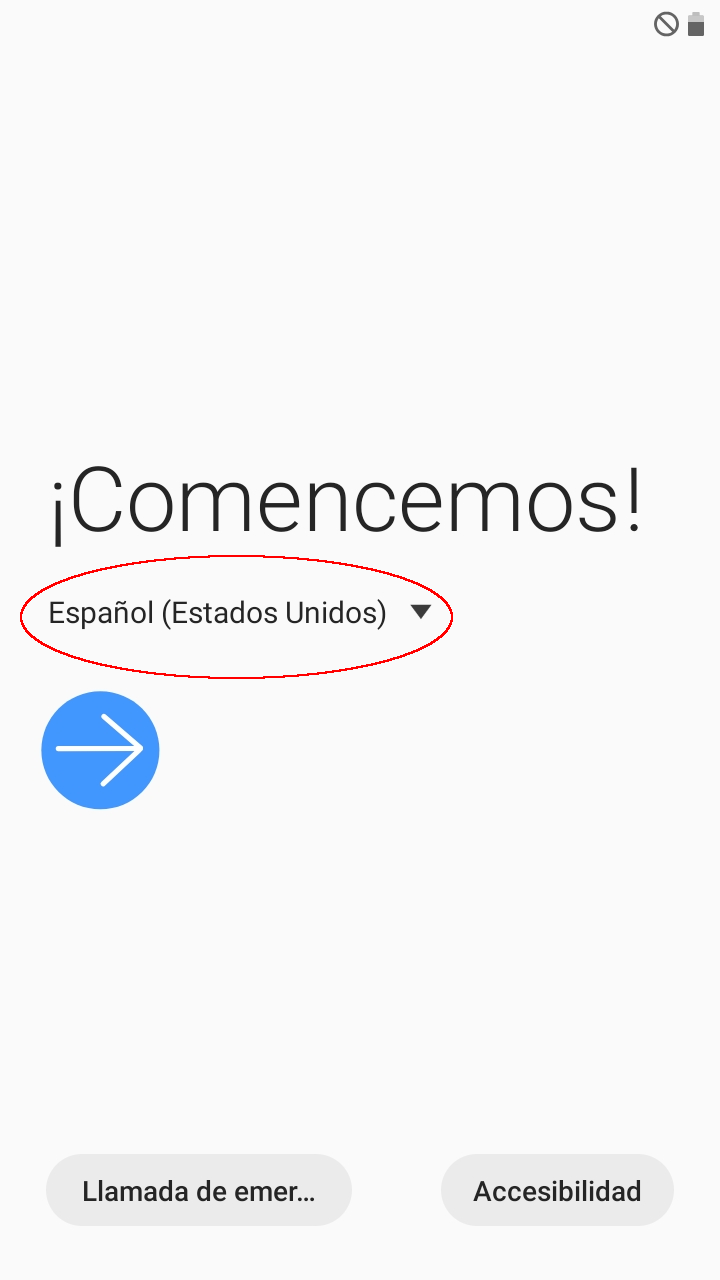
The following screen will be shown after the device has rebooted.
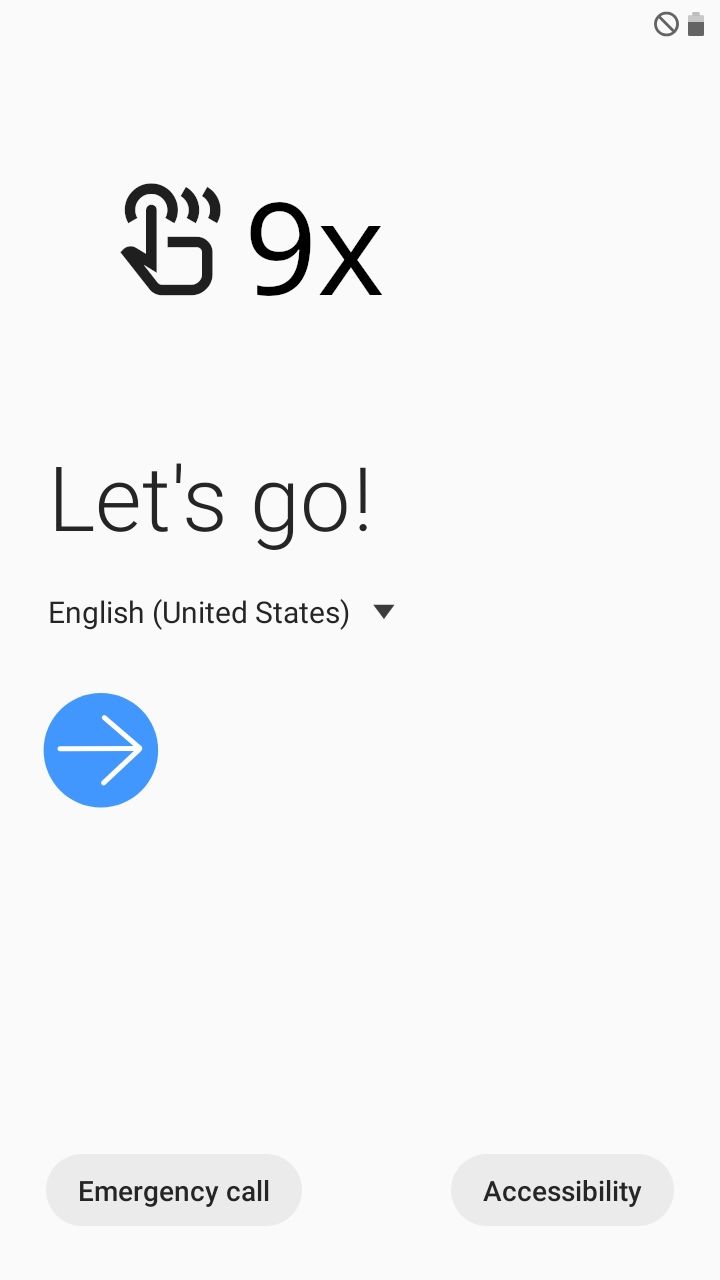
The language may have changed. Please select a preferred language.
Important: Do not press the blue arrow.
4. MDM Enrollment
Step 4
Tap on the white part of the screen 9 times. A QR code scanner will appear.
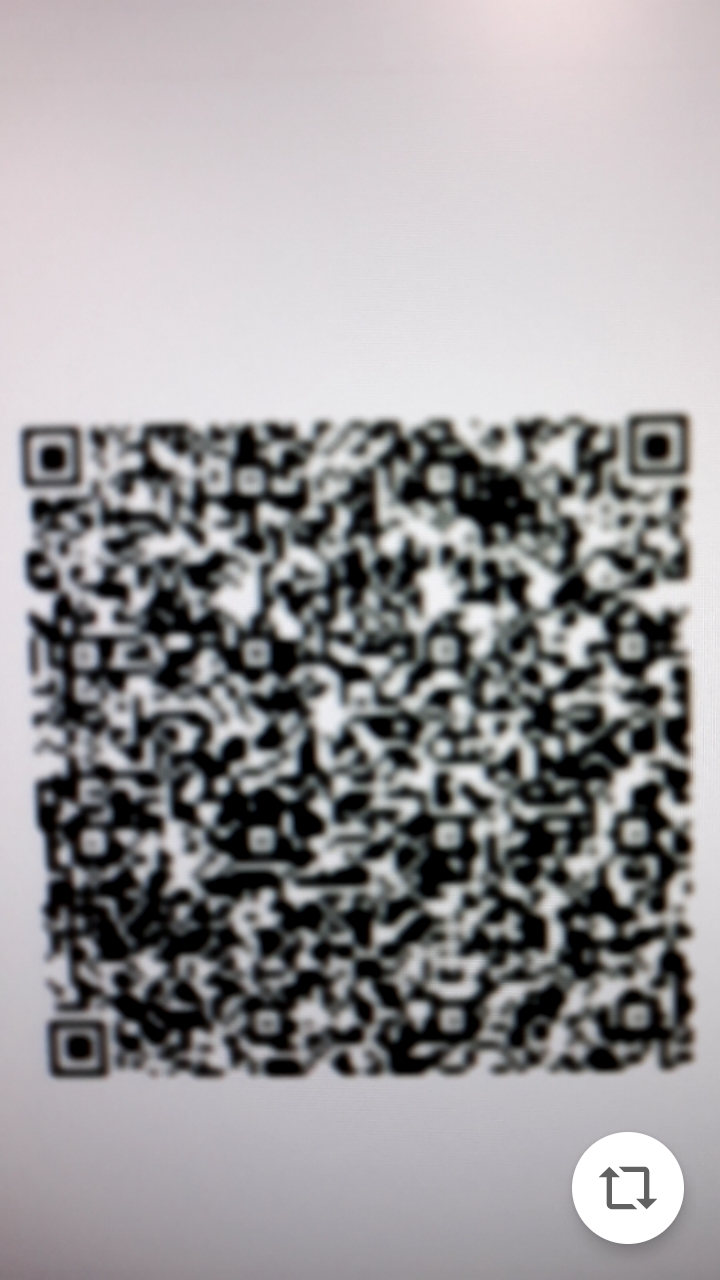
Step 5
Scan the QR code shown below.

Step 6
Connect to a Wi-Fi network and tap next.

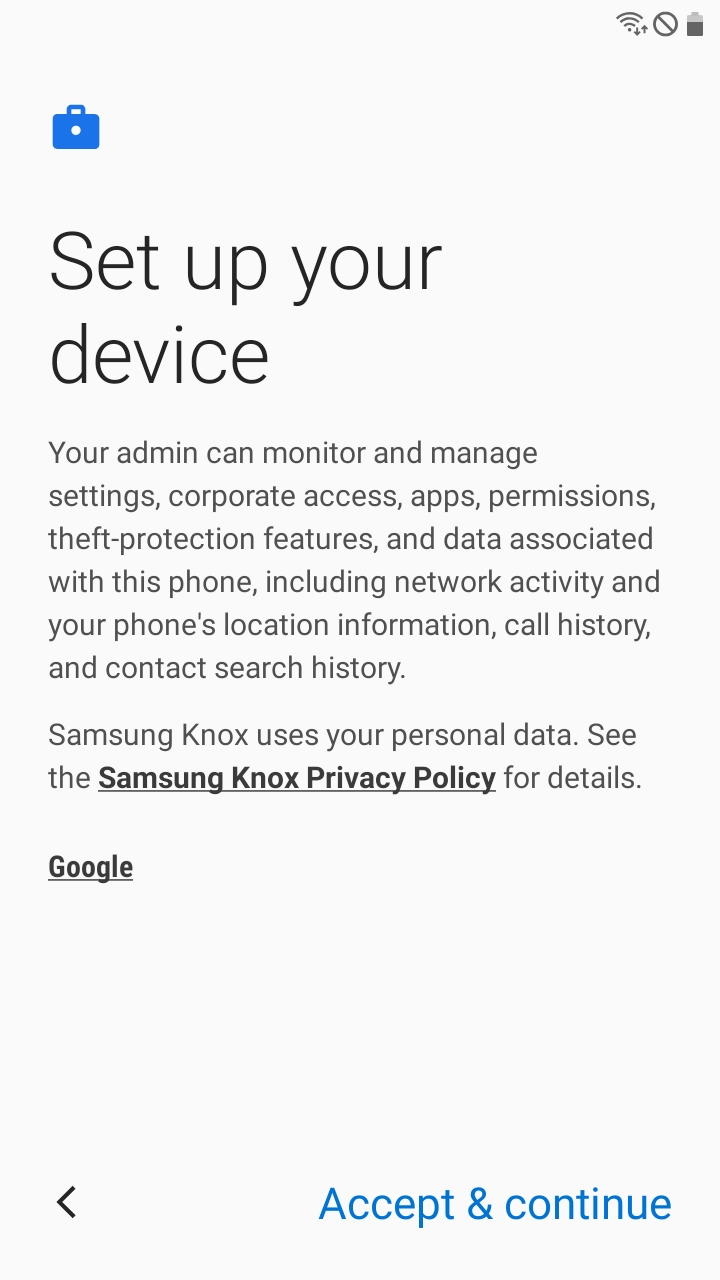
Step 7
Tap "Accept & continue". A loading screen will appear.

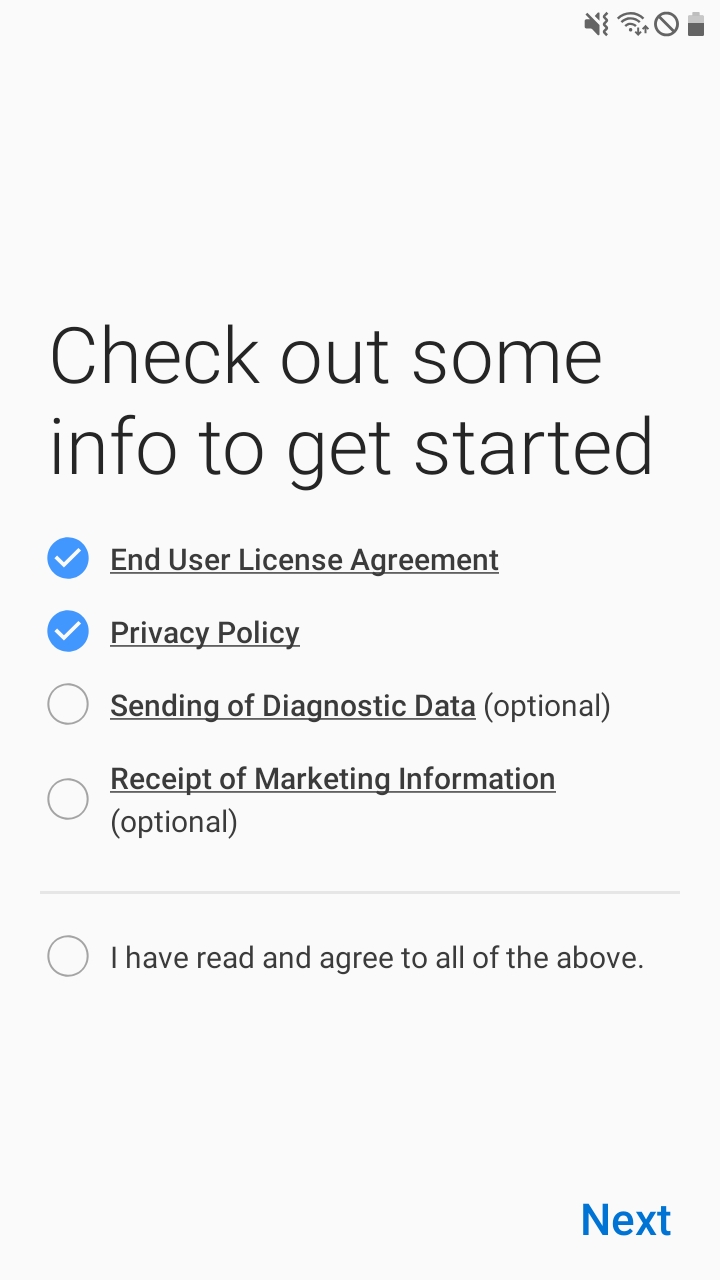
Step 8
After a few minutes, a legal screen will appear.
Select the first two options and press next. An installation screen will appear.
Important: The installation screen may appear before you are able to press next. This is normal.
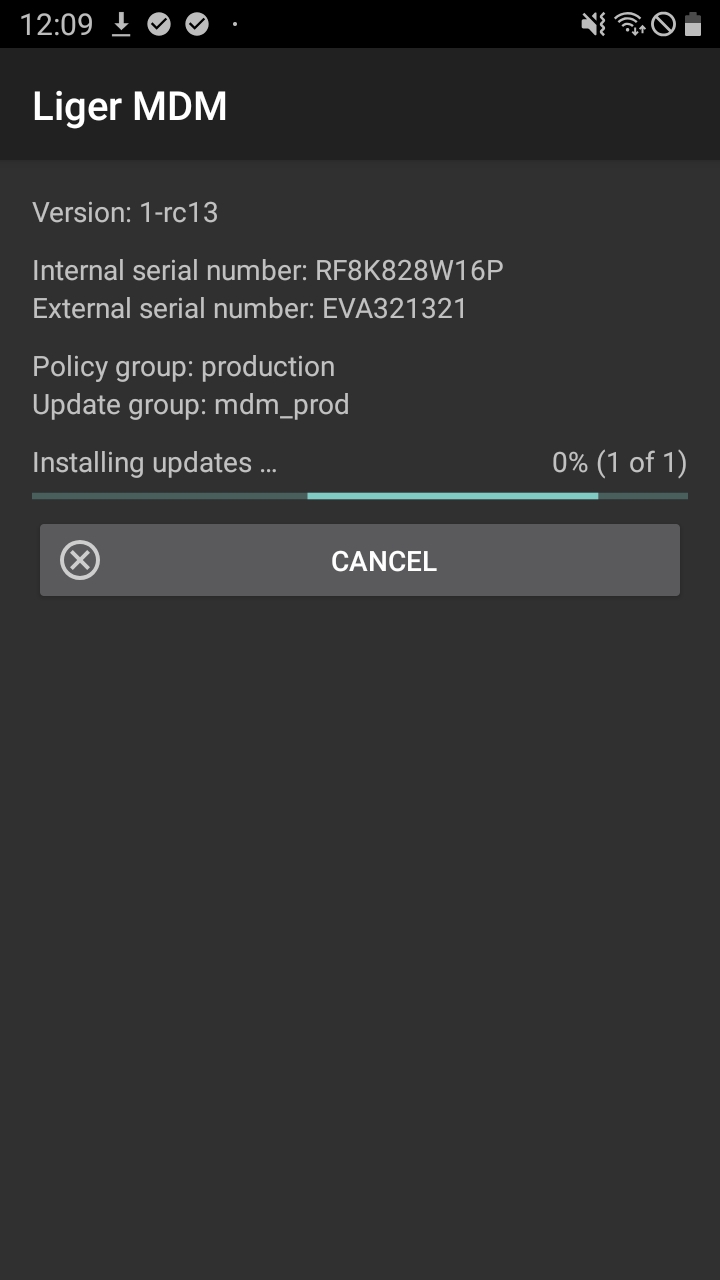
Step 9
If installation is cancelled or an error occurs, you will need to restart installation.
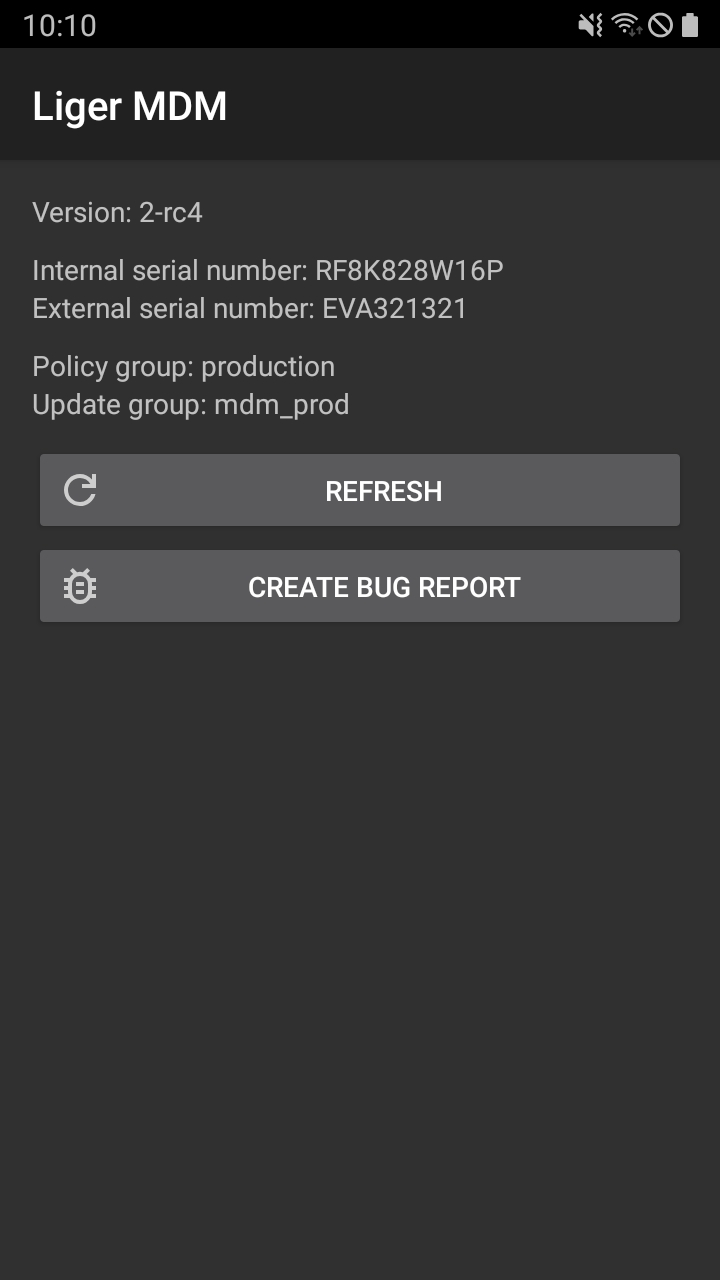
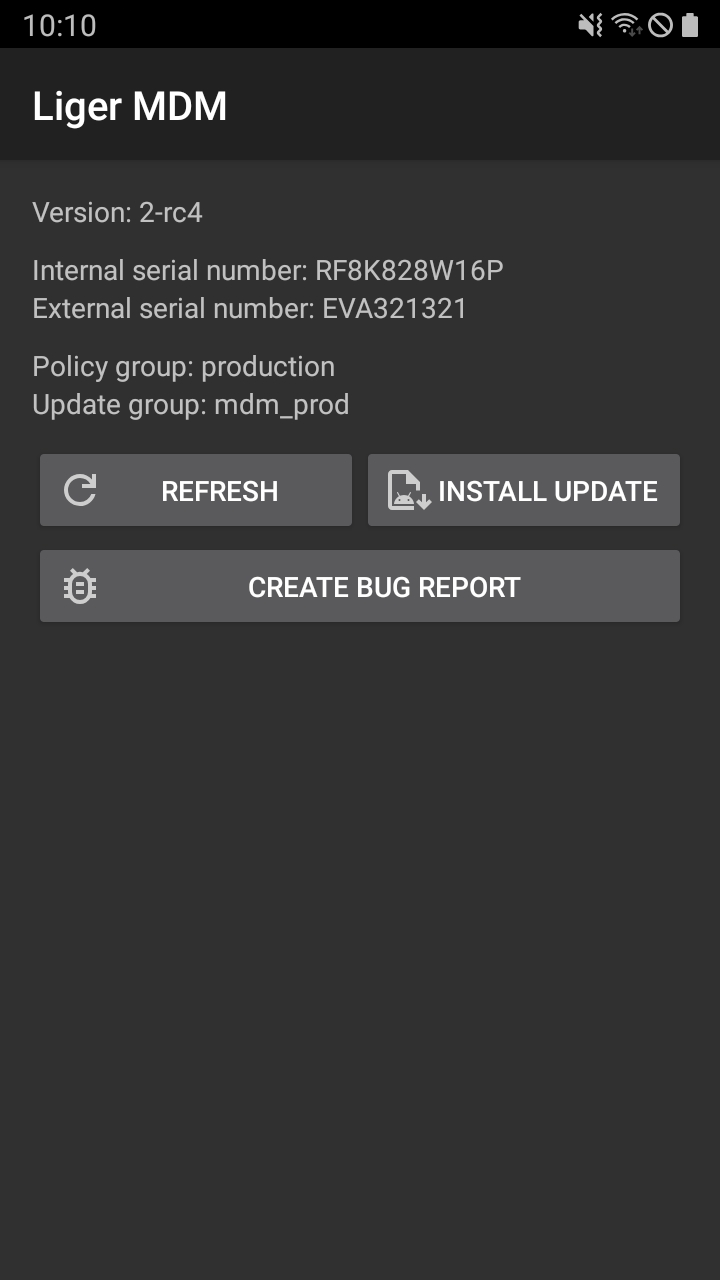
To restart installation, press refresh and then install update
Important: If this happens, you do not need to move on to the next step.
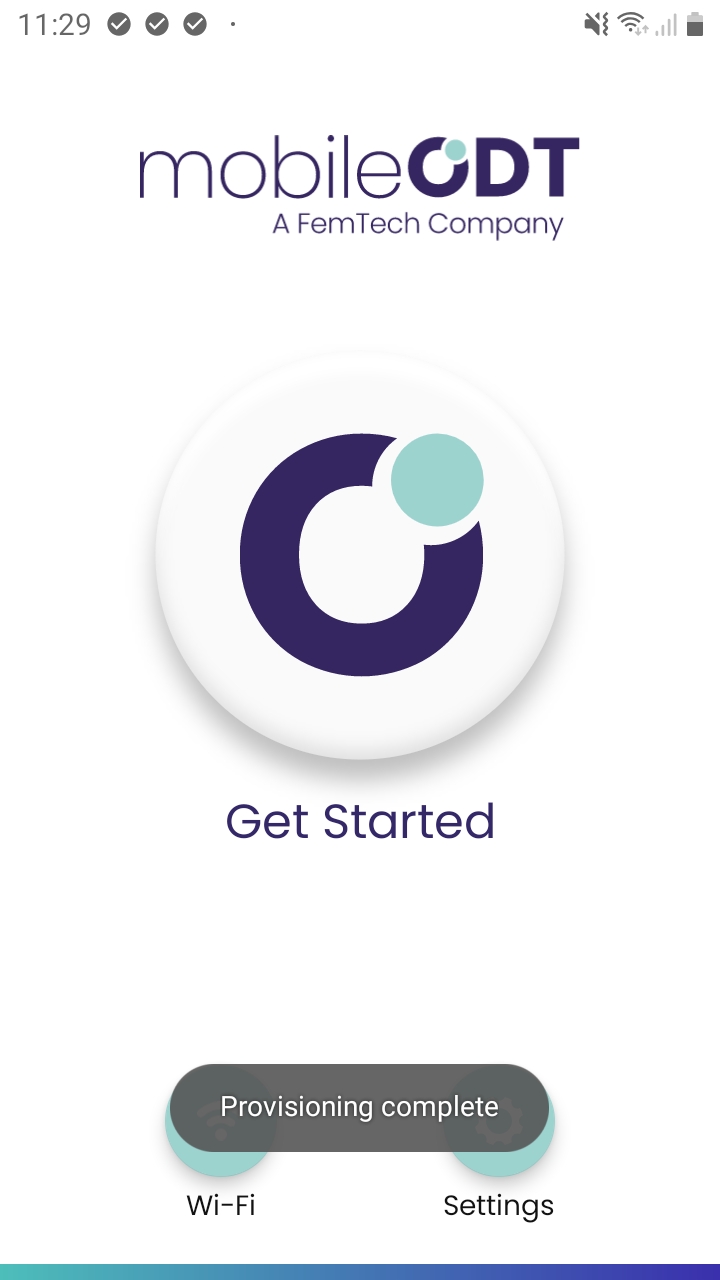
Step 10
When installation is completed you will see "Provisioning complete".